Sunday, October 21, 2012

Birthday card for mother-in-law

Yes, it's been a busy week for crafting.... can you tell? :D

So, yesterday evening (Saturday), hubby warned me that my mother in law was coming to dinner tonight (Sunday) for her birthday. That's all the notice I was given. Then he had to go out to give a lecture for the university.

While he was gone, I realized he has been out of town, running constantly since he got back, and the chances of him having gotten either a gift or a card for his mom were pretty slim. He just hasn't had time.

I, however, had been thinking ahead. For Christmas, I thought, but I'd forgotten her birthday was this month. (For some reason, I have it stuck in my head that she's got a spring birthday...). Well, luckily, the materials I'd ordered to make her a Christmas card came in on Friday. How's that for timing?

So, I hurried and made her a quick card for her birthday instead. And, luckily, it was a hit! She's a fan of Asian art. I kept things simple and used paper from the Die Cuts With A View Far East Stack which, luckily, coordinated not just with each other, but with her tastes as well. If I'd had another afternoon, I would have fussy-cut the butterfly and branch against the outer frame instead of box-cutting it like I did, but I didn't have enough time to do that right.


Autumn arbor


This card originally was just because I had the materials and idea, then I discovered this month's Crafter's Companion challenge rules had changed. Instead of needing to use specifically a Crafter's Companion stamp, *any* obvious Crafter's Companion product qualifies. And I used Spectrum Noir markers to color. Soooo... I'm now entering it in the Crafter's Companion challenge (fall colors) for the month. :D

I used memento ink to stamp this arbor on some parchment effect paper, then cut it using a Spellbinders Fleur de lis die. (Amusingly, I wasn't sure I wanted that die when I got it, the illustration just didn't look too impressive, but now that I've got it, it's one of my favorites). I colored the stamp using my spectrum noir in fall colors (which are almost the only spectrum noir I have so far...), added a touch of chalk in the middle of the roses for texture and 'oomph', then colored the wood of the arbor and the bench using my white sakura glaze pen. Then I ran a sheet of orange glitter paper through the same Spellbinders die and used the punched pieces in the cutouts.

Fall cuts

I'll update this post with more information later (running to dinner with mother in law), but here's an entry for two challenges. Our Daily Bread Designs (a sketch challenge) and Cheery Lynn (use corner embellishments)


Edited to add materials:
Dies: cottage cutz filagree fall leaves; memory box snowflake corner die; cheery lynn mini butterlies set (one of the butterflies of the trio); spellbinders dies;
stamp: inkadinkado
Challenges: Our Daily Bread Designs
Cheery Lynn

Thursday, September 27, 2012

Dots? Well, technically.....

This month's challenge over at Crafter's Companion is to do a project using stripes and/or dots. I'm not really a stripe or polka-dot person, so I've been mulling this one over a bit. Also been out of the crafty stuff for a few weeks after the news that the publisher of my favorite MMO, City of Heroes, is pulling the plug on the game despite it making a profit. No warning, apparently no hint to the developers, just suddenly poof! You're all fired, except skeleton staff, servers go down at the end of November, players you're out of luck. So I've been rather busy in a campaign to try and save our beloved game.

Anyway, that's just an explanation for why you haven't been seeing any projects from me lately. :)

Back to the point of this post, though... I finally came up with something that uses a stamp available from Crafter's Companion, and *technically* uses dots. So I figured it's worth a try to submit it. ;)


I stamped the Barnard Castle Art Kure stamp using Memento ink onto ultra smooth premium white cardstock, then colored it mostly with a stippling technique (stippling is dots!) using spectrum noir markers. I then cut it out in a spellbinders die, cut a second frame in a coordinating color, glued the second frame over the first, and applied some flowersoft in an autumn mixture.

This finished piece, by the way, is smaller than an ATC.

I'm entering this project into both the challenge at Crafter's Companion, and the challenge at Spectrum Noir.  Their challenge is to create a card or project for any holiday and color it using only Spectrum Noir markers.  I don't know about you, but for me, fall colors like this make me think of both Halloween and Thanksgiving, or even go farther back to the Harvest Festival.

Saturday, September 1, 2012

Very generous birthday giveaway :D

Stacy over at Scrap with Stacy is having a birthday giveaway, with some very nice stuff.  Hop over and take a look!

Sunday, August 26, 2012

Cheery Lynn Doily Challenge

I did mention I was addicted to challenges this month, right? :D  I barely got this one done in time, though.

Most of the challenges I've found deal with stamping, but this one was for dies. Yay!  I love dies!  Specifically, Cheery Lynn's challenge this week was to use a doily in a design.  And while the doily didn't have to be Cheery Lynn, at least one die on the project had to be.

Lucky for me, I'd just recently purchased two "Christmas themed" Cheery Lynn dies from Sweet Stamps.  The Christmas is in quotes because while they're called Christmas doilies, I think they have so many more uses.

Like stained glass?


That's what I went for anyway.

I started by using a colorbox ink  (mermaid specifically) on a technique I've been wanting to try -- applying the ink to one part of an embossing folder before running it through the machine.  I used a Cuttlebug embossing folder (Madison) and was rather happy with the results.


My doily choice was the Christmas Ball Decoration, which I ended up cutting three times.  Once was in white and run through enough to actually punch the holes.  The second time was also in white, but purposely undercut so I'd have instruction lines for my coloring.  This die did come with an angel wing, but since I wanted multiple colors for the interior of the doily, I needed an undercut of the full die for best results.  The third time was in a darker blue, purely to add just a fraction more height and that barest hint of shadow.


I colored the second doily (the undercut) using Sakura Stardust glitter pens.  Wow do they sparkle. By far the best glitter pens I've used to date.


Then I added some leaves from a Sizzix die (one of the leaves from Flowers, Branches and Leaves) and drew a detail line on the leaves using a dark green Sakura glaze.


The butterflies are also Cheery Lynn, specifically the mini exotic butterflies.  Those I also cut twice, once in blue for the top layer and once in white undercut so I could use the same coloring technique on their wings.


I traced the blessing from a computer printout (my handwriting's not that good!  Also... transparent vellum isn't recognized by my printer....) onto a teal vellum, which I cut and lightly embossed using a Spellbinders die.


Finally, I added the flowers, which I'd put together from Michael's supplies several months ago for another project.  Glad I made extras. :D


My intention is for this to be part of a pair or perhaps a 3-part triptych with the other pieces also using doilies and finishing the blessing.

Let the Children Come

Apparently, I'm addicted to doing challenges this month. ;)

I found another challenge I decided to do.  This time, it's over at Our Daily Bread Designs, which looks like it has some nice Christian themed stamps and dies, and a few others that are more generic.

This week's challenge was a sketch challenge.  That's where the challenger provides a layout sketch for your project, and you try to do something to match the sketch.

Here's what I came up with after some brainstorming with mom.


This was done on a cardstock called stardust -- it's white with little colored flecks in it to give it a little character.  I printed the bible verse directly on the cardstock.  I used the Paintbox Poppets project CD from Crafter's Companion (link in my sidebar) for the girl and to print a coordinating paper for the ribbon.  I cut and embossed the girl and her coordinating frame with a spellbinders die.

On the bookmark/ribbon section, I stamped the flourish with Perfect Medium, then tapped blending chalk in blue and pink for the detail.  Then I dusted it with Perfect Pearls in a pink interference color.  The shine doesn't really show up well in the picture, but you can almost see it -- that's not a smudge on the lower leaf, that's reflection off the Perfect Pearls.

At the base of the ribbon is a cute angel stamp that I stamped in versamark watermark ink and tapped with the blue chalk, then I attached two pieces of lacy ribbon and a pink pieced flower for the 'bow'.  In the middle of the flower, I glued some flowersoft for a bit of center dimension.  Finally, I added a few highlights to the girl with sakura glaze pens.  Not much, just enough for a little pop here and there.

Monday, August 20, 2012

Morehead shaped popup card

This week's challenge over at the Sweetstamps blog was to create a popup pedestal card. This was tricky, but fun. I think it also works with the theme of friendship for this month's challenge at Crafter's Companion.

What I chose to do was a modified project from the Morehead CD.  For me, even though it's just one girl, the girl and butterfly motif is something I would definitely send as a pick-me-up or thinking-of-you to several friends, which is why I think it works with the friendship theme.


I fell in love with the CDs after trying the Paintbox Poppets, and this Morehead collection has some very cute projects as well (though I'm still partial to the Paintbox Poppets).


I printed the project on cardstock, then ran it through the printer a second time to apply the coordinating color to what would be the interior of the card. I printed a second copy of the card, then cut the girl from the second printout so I could raise her with foam tape. I added some glossy highlights to the shoes, butterfly, white dots, green leaves, and yellow flower centers by using the Sakura glaze pens, then applied flowersoft to her hat. A few glitter-gel pen highlights to the bows and umbrella, and just a touch of graphite shading in a few places, and the girl was ready to apply.


For the inside, I applied some solid purple cardstock panels, and stamped them with some butterflies and flowers for texture.  I created the pedestal from the same purple cardstock so it wouldn't stand out, but I wanted the butterfly-fairy to pop both literally and visually, so I stamped her in purple ink on a lighter purple cardstock.


Finally, I left a blank label that I die cut and embossed with my Spellbinders nestabilities (love these things), then added a small punched butterfly in a contrasting color.


Wednesday, August 15, 2012

Zendala Dare 14

Again, a bit belated, but I thought I had a great idea for what to do with this. Unfortunately, the idea didn't work out as well as I would have liked.


This was done on Erin's template for Zendala Dare 14

Saturday, August 11, 2012

I'm ready for autumn :D

It's been a hot one this year, and I'm definitely already in the mood for the crispness of autumn, and what little color change we get down here.  Which isn't much.  So, I've decided to make my own. :D

I made this card (blank inside, for the time being) to enter into this week's challenge at SweetStamps, which was to use a stamp for a background.


I spritzed some parchment-textured cardstock with orange and green glimmer mists, then stamped the alternating corners with a stamp from the inkadinkado Foliage Trails set, stamped in pumpkin stazon ink.  Then I cut the pumpkin using the cottagecutz filigree pumpkin, placed it on a scalloped oval punched from a lighter shade of parchment cardstock, and used blending chalks to color the scallops.  The pumpkin and oval are glued together, then attached to the base of the card with some foam to raise them up just a bit.

Friday, August 10, 2012

Zendala Dare 12 :)

Okay, so I'm a bit behind. More than a bit, really. ;) But I got in the mood to do another zendala, so browsed through the templates offered by Erin, and settled on the template for Zendala Dare 12. Here's my end result. Or at least end result without shading. I am going to go back and shade it, too. :)

Wednesday, August 1, 2012

A cousin care package

One side of my family is going through a particularly rough patch with health problems all through the family -- including the uncle with Parkinsons that I've mentioned before.  So, mom (my primary sounding board) and I decided we needed to send them a creative care package.

It's taken a few weeks to get it all together, but it's finally ready to send.  All of the envelopes were made using the envelobox creator I got from Crafter's Companion.  (I've also blanked out all the names but mine in the photos, for privacy)

First, for my uncle.  He loves photography and loves the American Southwest, so I printed a picture I took in the Valley Of Fire from a trip there earlier this year and put it in a simple folded frame.  Originally, we intended to embellish it with deer or grasses or something, but in the end we decided the picture spoke best on its own. 


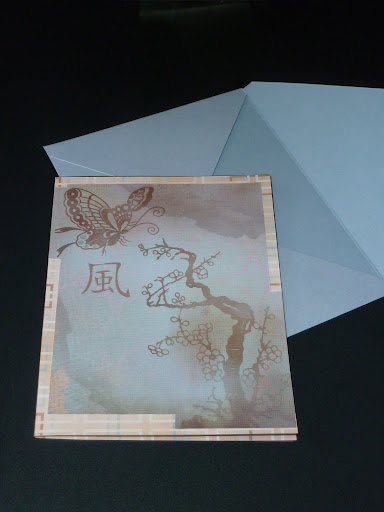
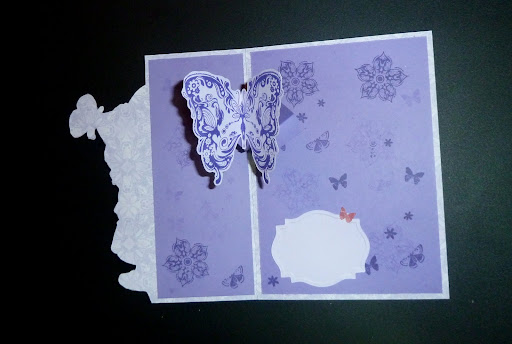
Next, for his daughter / my cousin, K, who is a very strong Christian.  (Honestly, I don't know how the family would get through all they've been through and are going through if not for their faith).

This one was a bit larger, and required an inner box inside the envelobox in order to have enough support to not damage the flowers. In theory, the finished piece stands up on its own. This was done using a cross on some very pretty scrapbook paper, which I cut out to decoupage, then pieced together the flowers and used some flourish dies cut in two different but complimenting colors to create a shadow effect. The lighter blue is the same paper the cross was on, and the dove (cut by mom :D ) was from that same sheet.


For K's oldest daughter, C, I made a cowboy themed card. She loves all things cowboy. After gluing the denim and bandana papers to cardstock to strengthen them, I ran the card through the big shot with some Spellbinders Nestabilities to create the window.


For K's younger daughter, M (who has some serious health issues), we opted for another cross, and a bible verse, with a color theme in her favorite color of blue. I used two cottagecutz dies, one Spellbinders, and a Spellbinders embossing folder. The cross was filled in with sakura glaze pens, and I used chalks to color the edge of the verse.


And finally, for M's 2 year old son, J, who hasn't gotten to see much of his mom since she's been in the hospital so much, a Noah's Ark card. :)


We hope that all of these will bring just a little smile and moment of joy and peace to them in these trials.